Create Profile
Overview
Once an external applicant has registered for a user account they can create a profile. The profile must be completely filled out in order to apply to positions.
Navigation
Click on "Required Profile Information is Missing, Please Complete Your Profile" under the  tab.
tab.

Entering Personal Information
Overview
This is where an applicant enters their personal information. This is part of the profile and will be used when applying to jobs.
Navigation
In the profile screen click on the  tab.
tab.
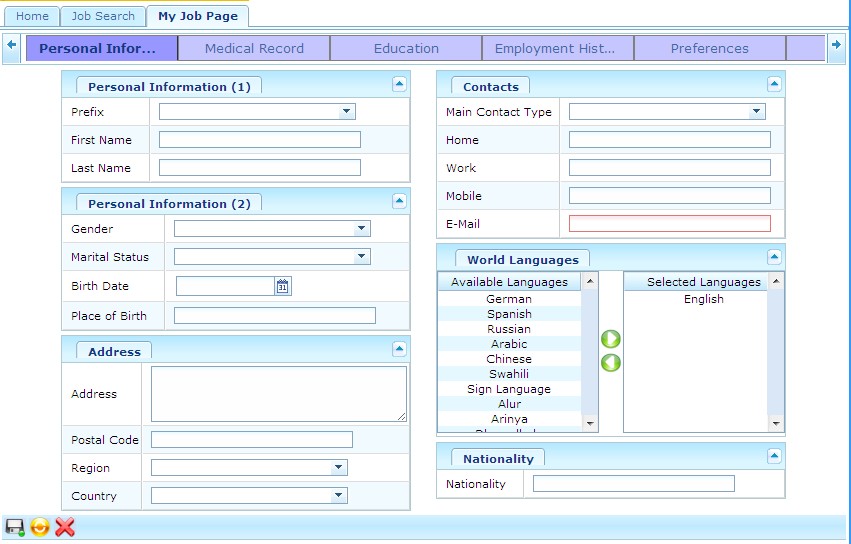
1. Select the Prefix from the drop down menu
- Prefix: Prefix to name of external applicant
2. The First Name and Last Name will be automatically generated. These will come from the user registration.
- First Name: first name of external applicant
- Last Name: last name of external applicant
3. Select the Gender and Marital Status from the drop down menus as required
- Gender: gender of the external applicant
- Marital Status: marital status of external applicant
4. Enter the Birth Date
- Birth Date: the date that the external applicant was born. To enter the date, click on the Calendar icon
 and select the date.
5. Enter Place of Birth, Address, and Postal Code as required
- Place of Birth: the location where the external applicant was born
- Address: the address of the external applicant
- Postal Code: the postal code of the external applicant
6. Select the Region and Country from the drop down menus
- Region: the region where the external applicant currently lives in
- Country: the country that the external applicant currently lives in
7. Select the Main Contact Type from the drop down menu
- Main Contact Type: is the main contact for the external applicant. Whatever type is chosen will become a mandatory field to be filled out.
8. Enter Home, Work, or Mobile contact information
- Home: phone number at the external applicants home
- Work: phone number at the external applicants work
- Mobile: mobile phone number of the external applicant
9. E-Mail will be automatically generated from the user registration
- E-Mail: email of the external applicant
10. The World Language will be automatically generated from the user registration. Click on the appropriate arrows to add or remove languages.
- World Language: the language used by the external applicant
11. Enter the Nationality
- Nationality: the nationality of the external applicant
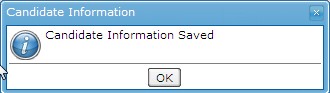
12. Click on the save icon at the bottom of the screen. The following will appear.
Entering Medical Record
Overview
This is where an applicant uploads a medical record. This is part of the profile and will be used when applying to jobs.
Navigation
In the profile screen click on the  tab.
tab.

1.Click the  to remove a Medical Record and the
  to cancel at anytime. To add Medical Record click the
2. The following screen will appear:

3. Click  and choose the Medical Record
4. Click  to upload the Medical Record
5. Click on the save icon at the bottom of the screen. The following will appear.

Entering Education
Overview
This is where an applicant enters their education backround. This is part of the profile and will be used when applying to jobs.
Navigation
In the profile screen click on the  tab.
tab.

To ADD an Education:
1. Select the Education on the right and then use the arrow buttons to move it to the appropriate place.
To CREATE an Education:
1. Press the Add button 
2. The following screen will appear:

3. Enter the Institution Name.
- Institution Name: The name of the school
4. Enter the Graduation Date
- Graduation Date: the date that the applicant graduated from the institution. To enter click on the Calendar icon
 and select the date.
5. Click the  to save the Education.
6. Upload a Cover Letter, Achievments, Publications or Resume if required. To upload a document click the  and select the document. To remove a document click the
  .
.
- Cover Letter: a letter sent to explain the contents of, another document.
- Achievments: any certificates or designations
- Publications: documents that have been written by you and published
- Resume: a document that presents an applicants background and skillset
7. The following screen will appear:

8. Click  and choose the Document
9. Click to upload the Document
10. Click on the save icon at the bottom of the screen. The following will appear.
Entering Employment History
Overview
This is where an applicant enters their employment history. This is part of the profile and will be used when applying to jobs.
Navigation
In the profile screen click on the  tab.
tab.

To ADD Employment History
1. Click the Add button 
2. The following Screen will appear:

3. Enter Employment Name and Supervisor Name
- Employment Name: name of the company where the applicant used to or is currently working
- Superviror Name: the name of the person who supervised the applicant
4. Click the Add button to enter the Supervisor's Contact information
5. The following screen will appear:

6. Select the Language from the drop down menu
- Language: Language used
7. Enter a Description
- Description: description for the contact person
8. Select the Contact Type from the drop down menu
- Contact Type: the way to contact the supervisor. For example: telephone, email or fax.
9. Enter the Contact
- Contact: the actual email, telephone number or fax number
10. Check Is Main if applicable
- Is Main: check if the contact is the supervisors main source of contact
11. Click Save button to save the Supervisor's Contact
12. Enter the Job Title, Job Function, Achievments, Start Date and End Date
- Job Title: the title that the applicant held at the previous employment
- Job Function: what the applicant was responsible for at the previous employment
- Achievement: what the applicant achieved at the previous employment
- Start Date: the day in which the applicant started working at the previous employment. To enter click the Calendar icon and select a date.
- End Date: the day in which the applicant stopped working at the previous employment. To enter click the Calendar icon and select a date.
13. Check Is Current if applicable
- Is Current: check if the applicant is still currently wokring for this employer
14.Click on the save icon at the bottom of the screen. The following will appear.
Entering Preferences
Overview
This is where an applicant enters their employment preferences. This is part of the profile and will be used when applying to jobs.
Navigation
In the profile screen click on the  tab.
tab.

1. Select the Job Level, Job Type, Job Schedule, Job Shift, and Job Status from the drop down menus.
- Job Level: the level of job the applicant wants (Director, Executive, Manager, Team Leader, Entry Level, Individual Contributor/Professional, Other, Not Specified)
- Job Type: the type of job the applicant is looking for (Cooperative, Experienced, Graduate Job, New Graduate, Occupational/Hourly, Temporary Work, Other, Not Specified)
- Job Schedule: the work schedule that the applicant is willing to work (Casual, Full-Time, Part-Time, Internship, Other, Not Specified)
- Job Shift: the hours the applicant is willing to work (Day Job, Evening Job, Night Job, On Call, Other, Not Specified)
- Job Status: the type of employment contract the applicant is looking for (Contractor, Regular Employee, Student Intern, Temporary Employee, Term Employee, Other, Not Specified
2. Enter the desired Salary.
- Salary: how much money the applicant is looking to make
3. Select the Currency and Travel Disposition from the drop down menus.
- Currency: the currency that the applicant would like to be paid in
- Travel Disposition: the amount of time the applicant is willing to travel
4.Click on the save icon at the bottom of the screen. The following will appear.
Entering Skills
Overview
This is where an applicant enters their skills. This is part of the profile and will be used when applying to jobs.
Navigation
In the profile screen click on the  tab.
tab.

1. Select a Skill from the list of available skills using the arrow keys
- Skill: the ability to do something well
2. Select the Years of Experience from the drop down menu
- Years of Experience: how many years of ecperience the applicant has with this skill
If the Skill is NOT in the available list:
1. Click on the  button to add a new skill
2. The following screen will appear:

3. Select the Language from the drop down menu
- Language: language used
4. Enter the Description
- Description: the name of the skill
5. Select the Years of Experience from the drop down menu
- Years of Experience: how many years of ecperience the applicant has with this skill
6. Click save to return to the Profile page.
7. Click on the save icon at the bottom of the screen. The following will appear.
Entering References
Overview
This is where an applicant enters their References. This is part of the profile and will be used when applying to jobs.
Navigation
In the profile screen click on the  tab.
tab.

1. Click  to ADD a Reference
2. The following screen will appear:

3. Enter First Name and Last Name
- First Name: the First Name of the reference
- Last Name: the Last Name of the reference
4. Select the Relationship from the drop down menu
- Relationship:the relationship betweent the candidate and the reference
5. Click to ADD a Reference Contact
6. The following screen will appear:

7. Select the Language from the drop down menu
- Language: language used
8. Enter Description
- Description: description of the contact
9. Select the Contact Type from the drop down menu
- Contact Type: type of contact. For example: phone number, email.
10. Enter the Contact
- Contact: a description of the contact value. For example: if phone number is entered in contact type, then in contact type the phone number the reference can be reached at.
11. Click on the Is Main checkmark, as required
- Is Main: if checked, this will be the main contact information
12. Click  to save the Contact, and to return to the Reference screen.
13. Click to add another contact value, or click to save the Reference.
14. Click to add another Reference or click at the bottom to save the References. The following will appear.